Shipping Schedule
This business screen provides an overview of shipping schedules using a two-tiered tree structure of date and delivery destination, and allows users to complete tasks such as creating picking lists, allocating inventory, and assigning personnel on a single screen.
Related Articles Shipping performance records are Shipping slip Upstream order creation is Individual Order Entry / Order Hub Please refer to the following. The on-site work screens for picking and shipping will be covered in an article in Phase 3. The overall sales process is Sales workflow , an overview of the progress is Order progress board Please refer to the following.
What you can do on this screen
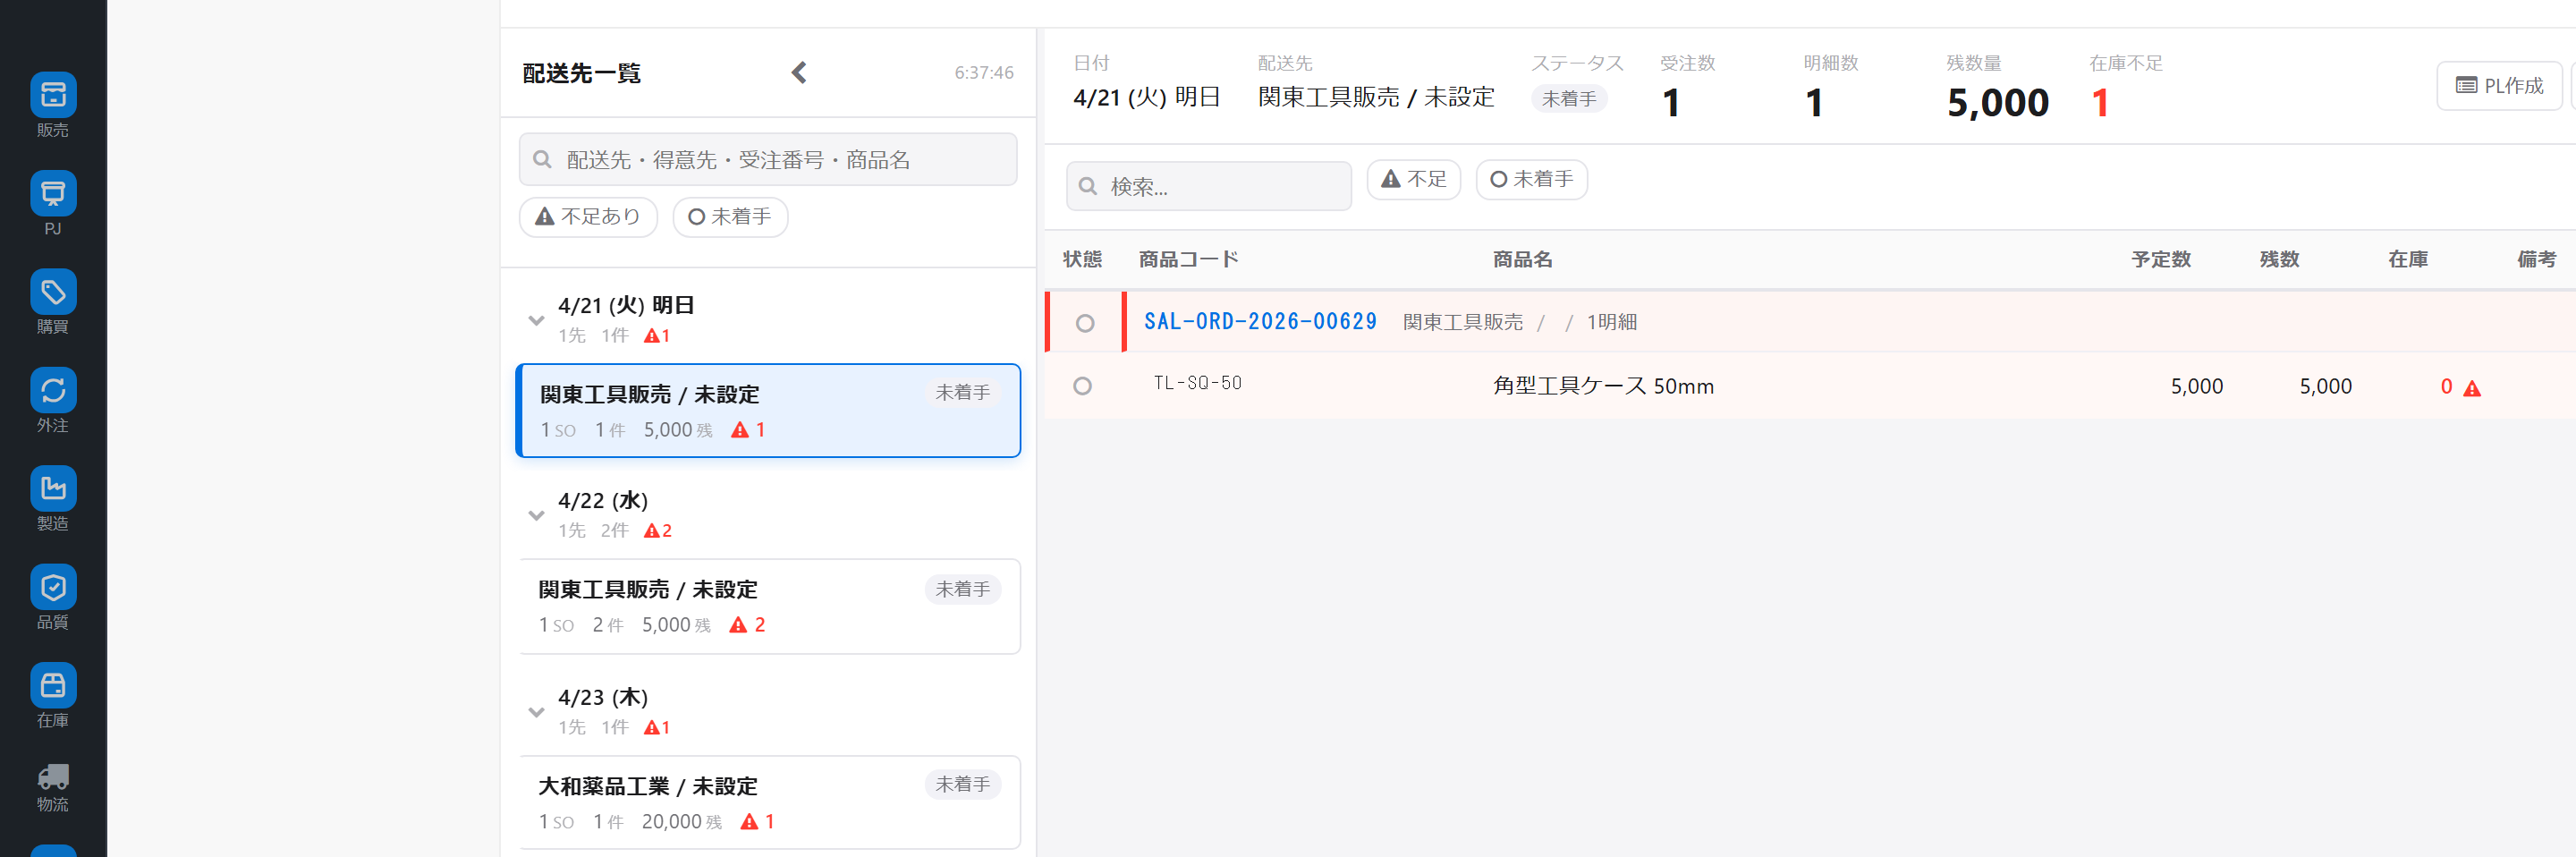
The shipping schedule list is a business screen that allows you to view the delivery schedules for orders, organized by date and destination.
- You can check this week's and tomorrow's shipping schedule by date and delivery address.
- Multiple order details can be combined and converted into a picking list (instruction sheet for the warehouse).
- You can allocate inventory for each item to ensure it doesn't compete with other shipments.
- You will be assigned as a picker (picking person) in the warehouse.
- When changing delivery dates, you can record the reason, which makes it easier to understand during audits.
Screen URL:/app/shipment-plan-list
Overall view of the screen
The screen is composed of two areas, left and right.
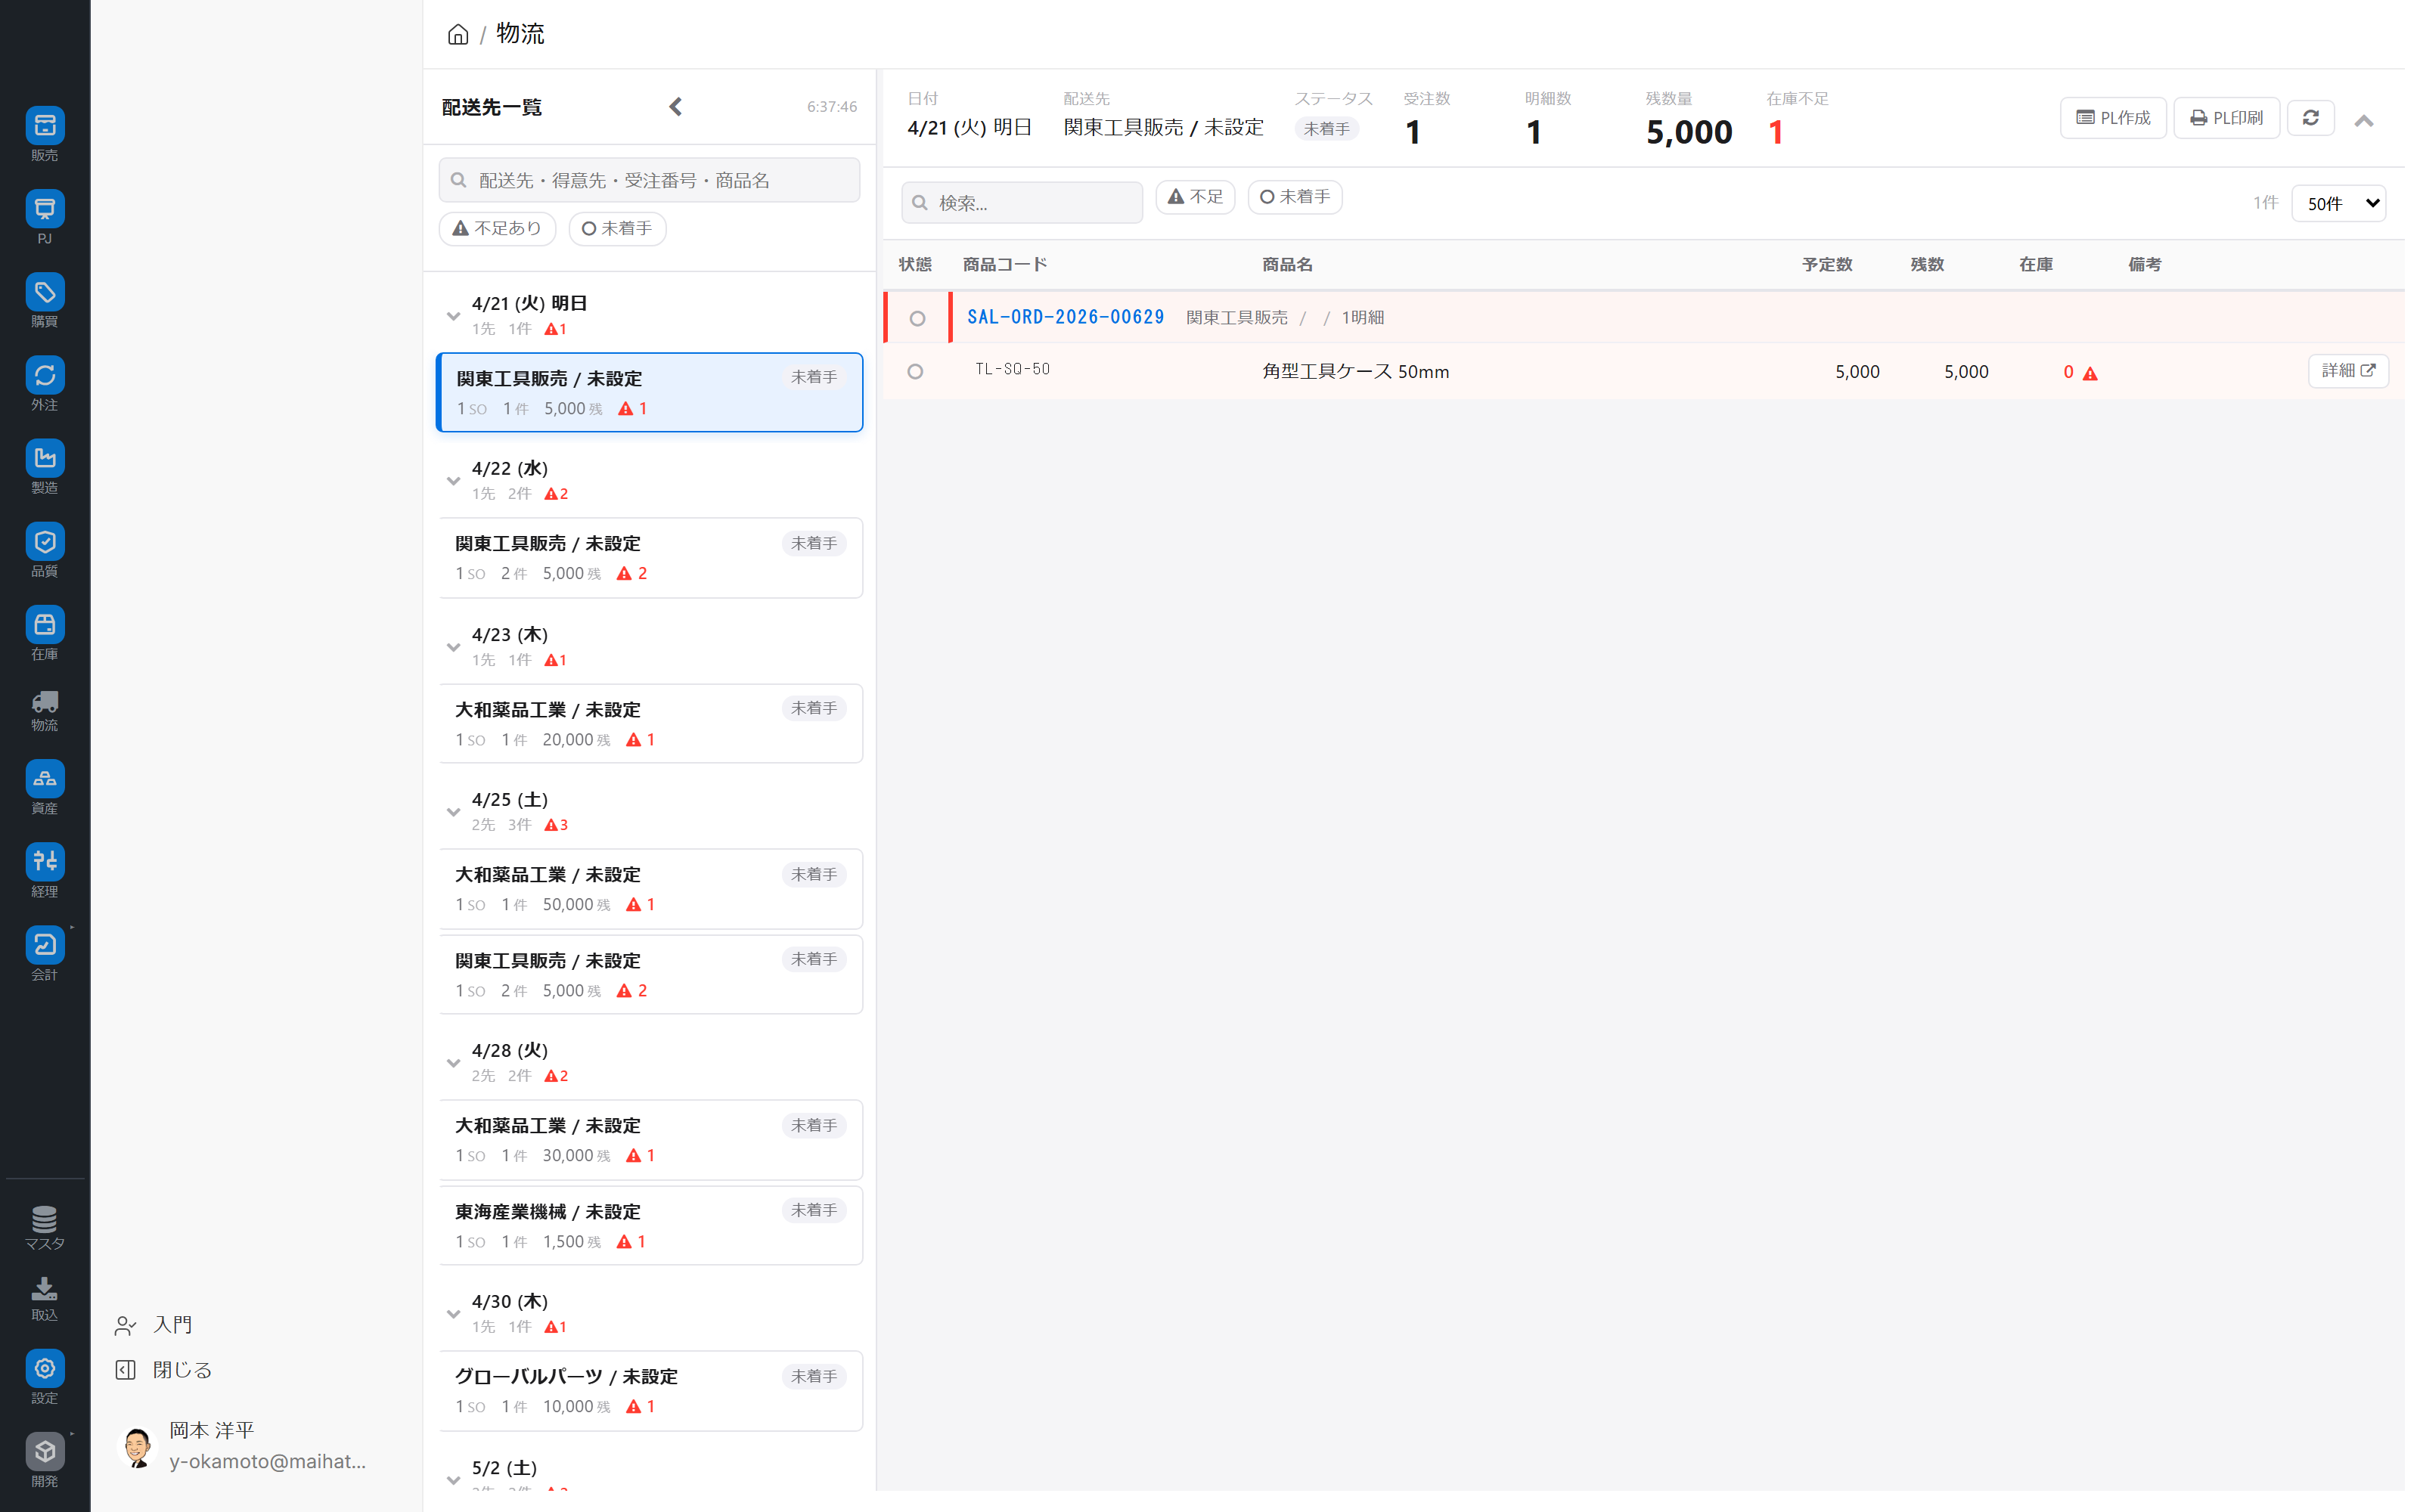
Left side: Date → Delivery destination tree
- Nodes are arranged by shipping date, and when expanded, the shipping destination card is displayed.
- Clicking on a date will display all delivery destinations for that day.
- Clicking on the shipping address will display the corresponding order details on the right.
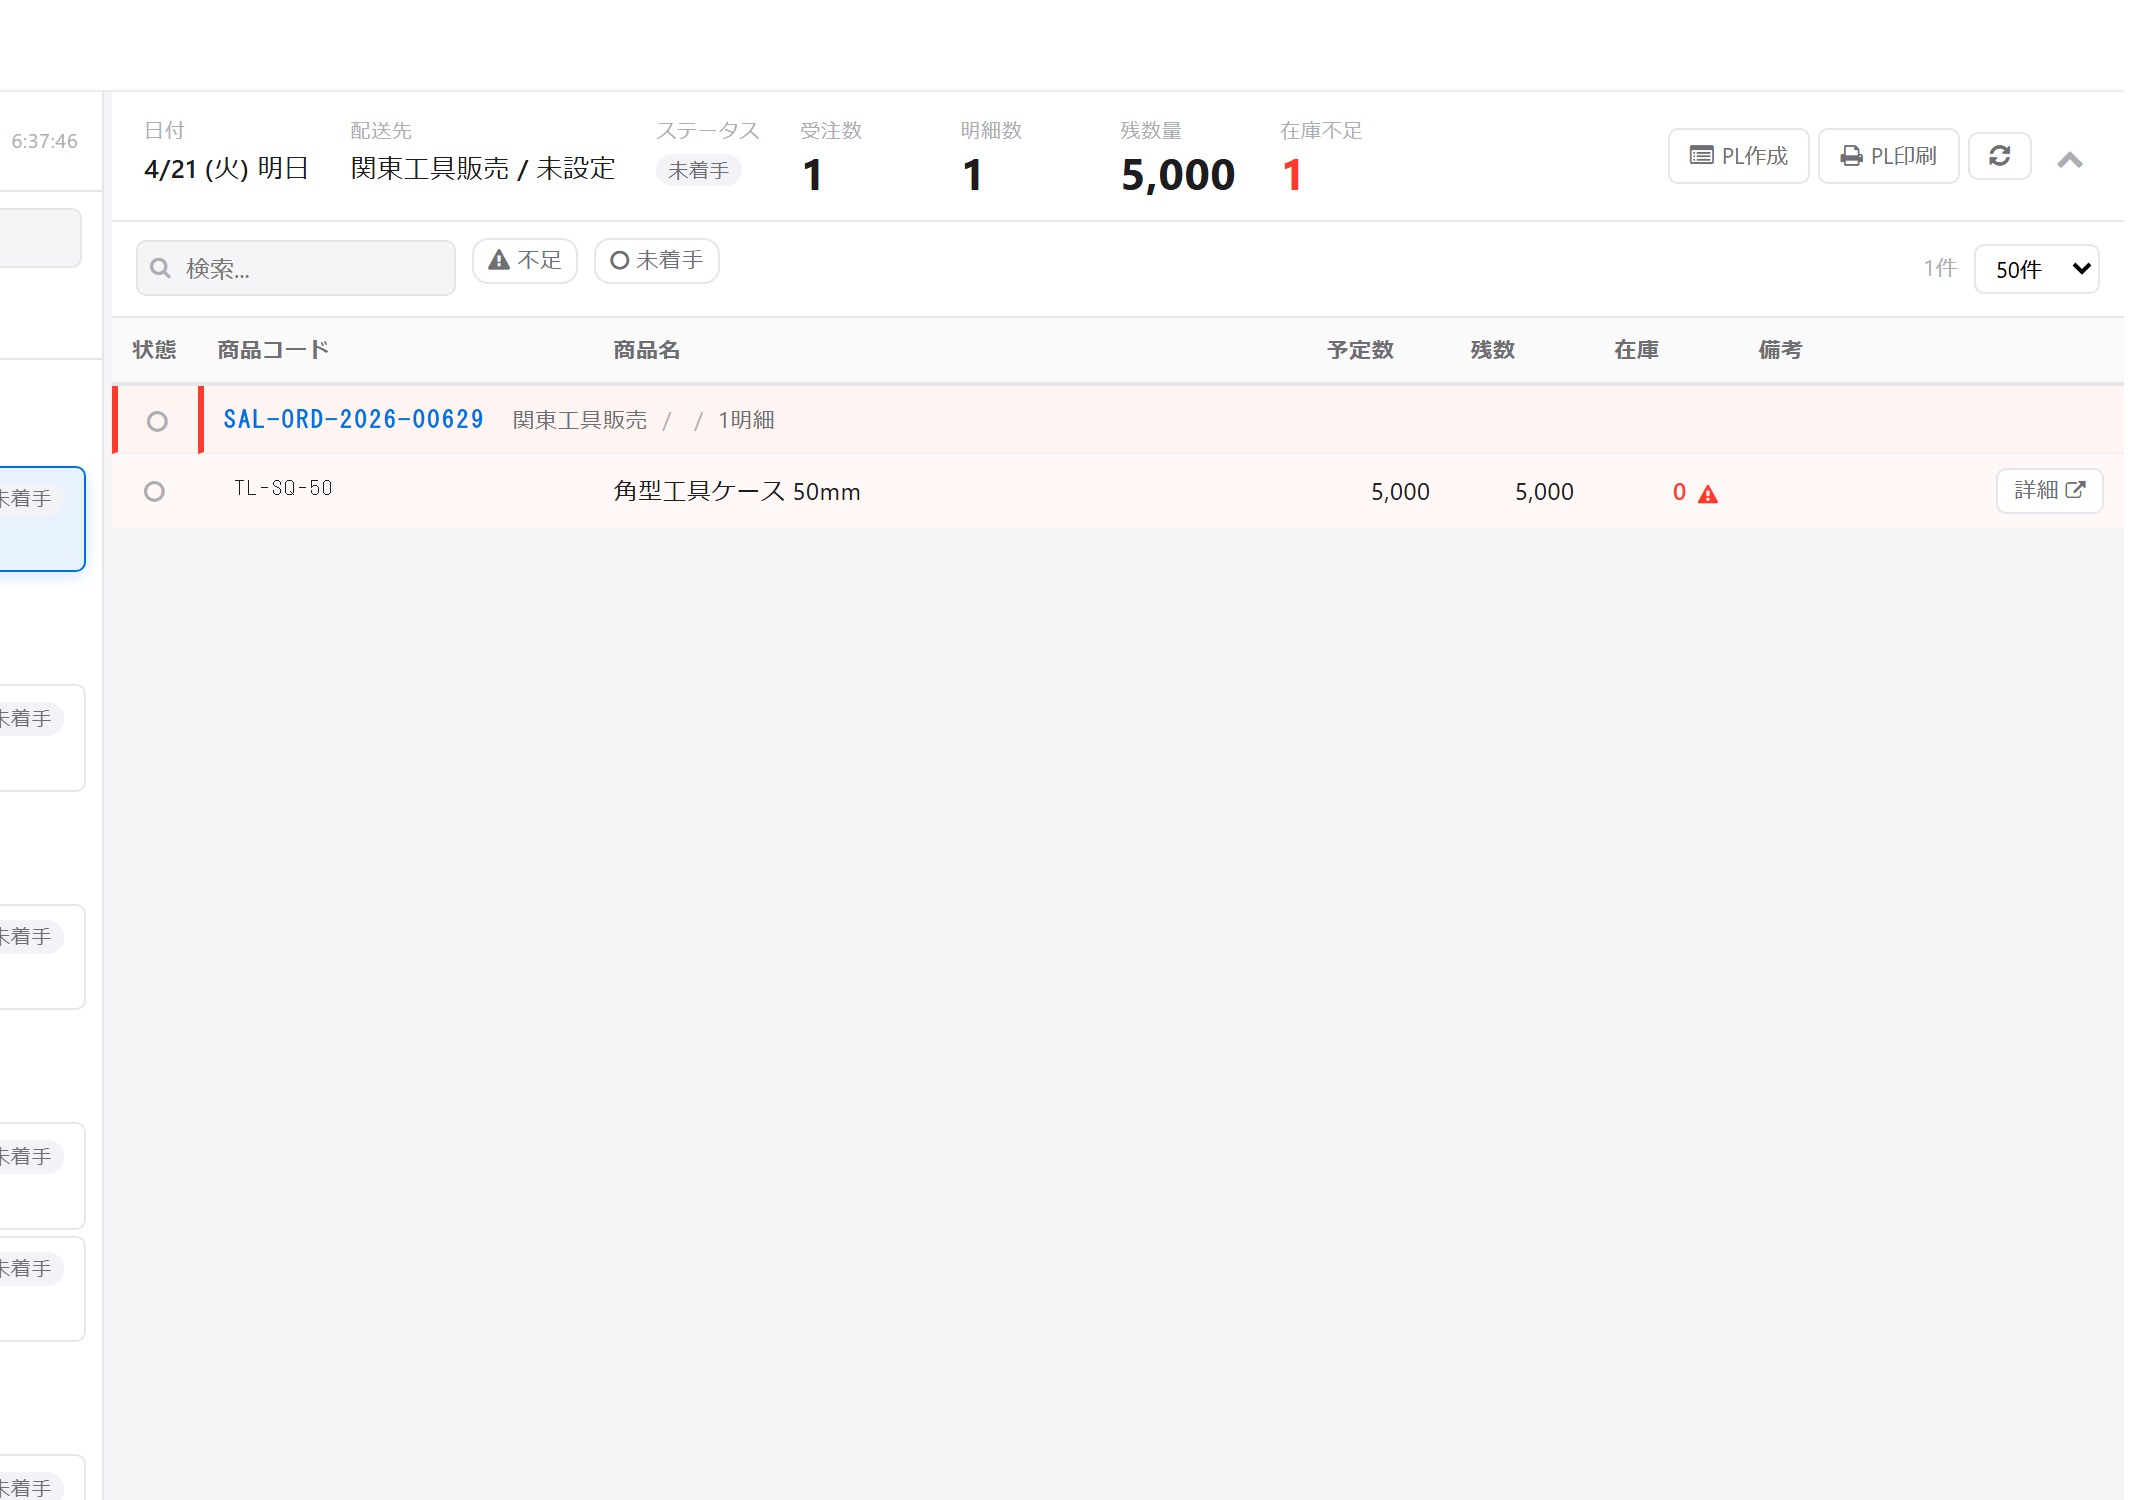
Right side: Order details
| Information | Content |
|---|---|
| Summary | Number of selected dates and delivery destinations, and total quantity |
| Detailed Statement | Item, Quantity, Inventory Status, Allocation Status, Picking Progress |
| Actions | Assigning personnel, creating picking lists, allocating inventory, etc. |
Supplement: Internal structure of "Shipping Plan"
This screen does not create new, independent "shipping plan" data. It simply groups existing order delivery dates and destinations by date and destination for display. Therefore, operations such as "change date" and "create picking list" on this screen are actually performed as data updates for orders, picking lists, and inventory allocations.
Main Features
| Features | Overview |
|---|---|
| Date → Delivery Destination Hierarchical Display | Delivery destinations are displayed in a tree structure for each shipping date |
| Order Details List | Item, Quantity, Stock, and Delivery Destination are displayed in one table |
| Inventory Summary | View inventory details for each item |
| Display Picking Status | Badge display for Not Created/Draft/In Progress/Completed |
| Assignment/Removal of Personnel | Designation of Warehouse Workers |
| Bulk creation of picking lists | Combine multiple items into a single instruction sheet |
| Shipping Date Change | Delivery Date Change (with reason recorded) |
| Inventory Allocation/Release | Reserve inventory for specific order details |
| Shipping Notes | Handover Notes for Each Shipment |
Main Operations
1. Check the shipping plan for the following day.
- Open the shipping schedule list.
- Click on the next day's date on the left side.
- Click on the shipping address displayed below to view details.
- Check order details, inventory status, and picking progress on the right side.
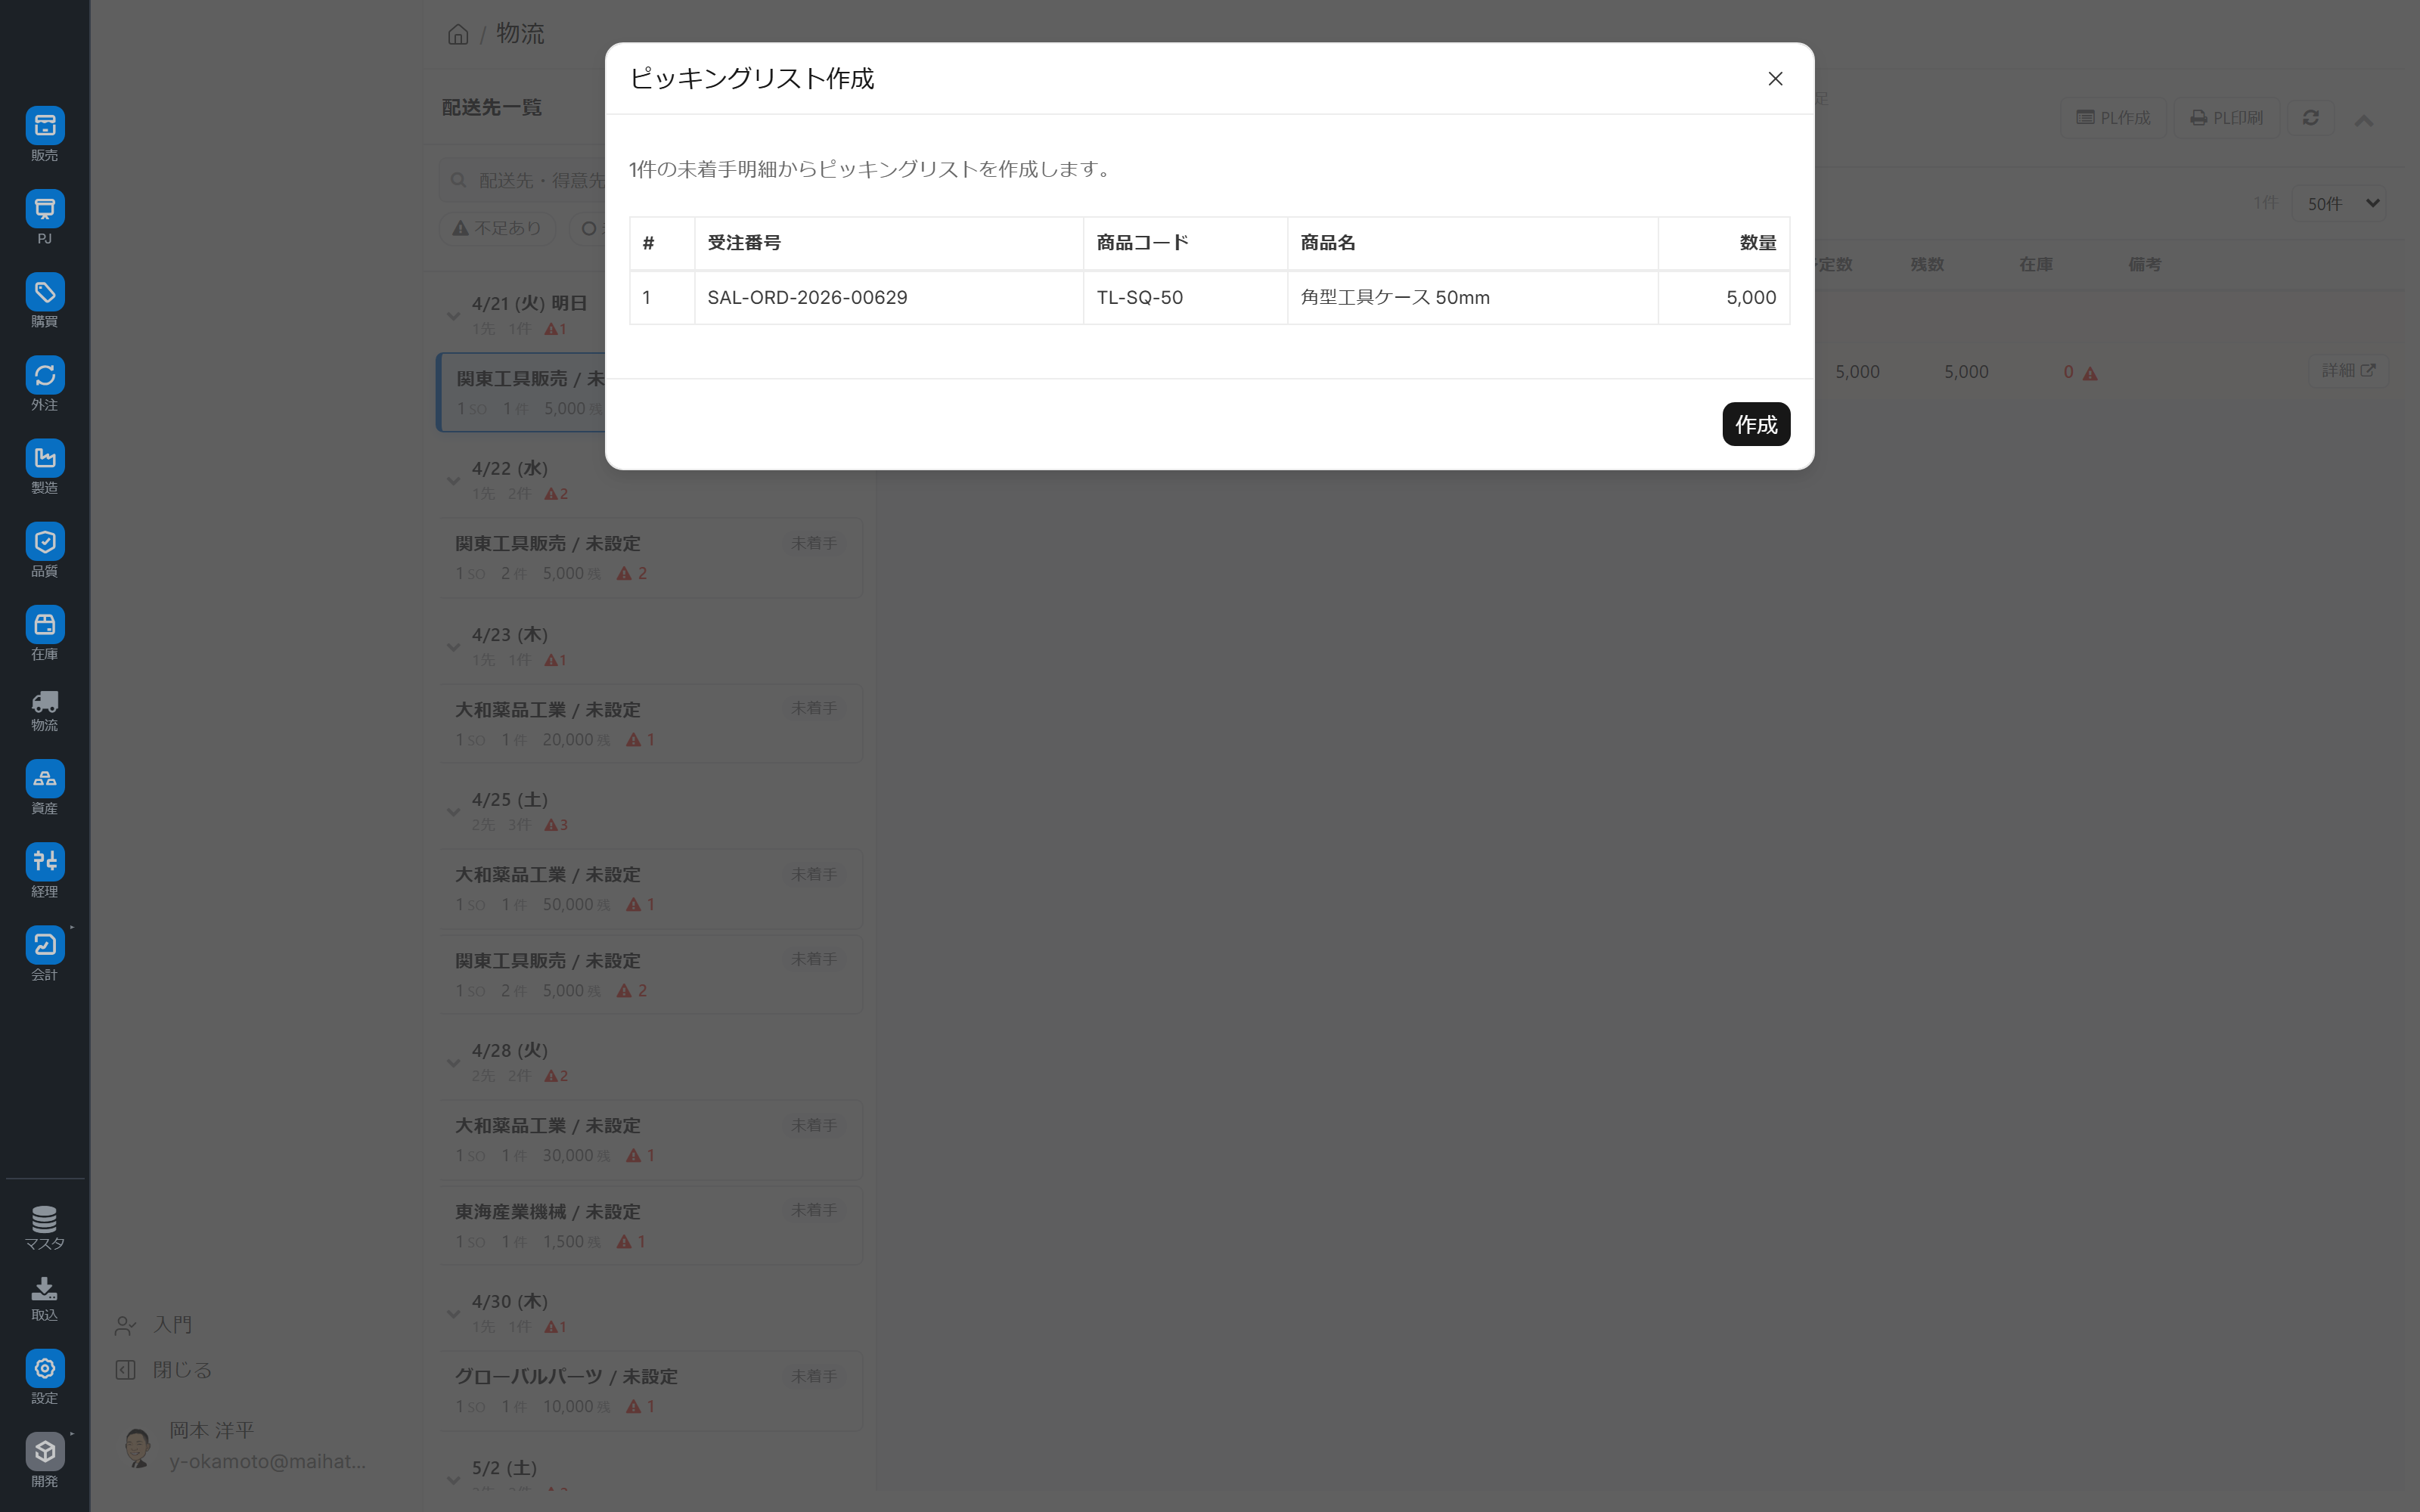
2. Create picking lists in bulk
- Select multiple order details.
- Click the "Create Picking List in Bulk" button.
- Specify which warehouse to pick from (parent warehouse).
- Select either Automatic Pick or Manual Pick
- A draft picking list will be created.
- As picking progresses, the badge on the tree will automatically switch between Not Created → Draft → In Progress → Completed.
3. Assign pickers (person in charge of picking)
- Select the item(s) you want to select.
- Select a warehouse manager using "Assign Personnel".
- The person in charge will be able to check the relevant picking list on their scan screen.
- To cancel, select "Cancel" from the same screen.
4. Change the shipping date (with reason)
- Select the item(s) you want to select.
- Click the "Change Shipping Date" button.
- Enter the new date and reason for the change (e.g., "Postponed to the next day due to customer request").
- The scheduled delivery date for the order will be updated, and the reason will be recorded in the audit log.
5. Allocate inventory
This feature is available when the inventory allocation function is enabled.
- Select the item(s) you want to select.
- Specify the target warehouse in "Inventory Allocation".
- Inventory is allocated, and the same inventory can no longer be contested by other items.
- If you wish to cancel the allocation, select "Cancel" on the same screen.
- The allocation status (allocated/not allocated/insufficient) can be viewed on the screen.
Note: Canceling an order may not automatically release the allocation. In such cases, please explicitly release the allocation.
6. Leave a shipping memo
You can save handover notes for each shipment, such as messages to customers and instructions for drivers. These can also be viewed on the on-site scanning screen.
Tips for Use
- Morning 10-minute routine: Every morning at 8am, check the day's inventory, create the picking list, and assign tasks to each person.
- Delivery routes are based on regional divisions: This can be used as a guideline for optimizing routes based on the customer's region (territory).
- Allocate inventory carefully: Over-allocating can easily lead to inventory shortages in other orders.
- Clearly state the reason for the change in shipping date: This will be recorded in the audit log, so standardizing the reason to "customer request," "internal company circumstances," "weather," etc. will make it easier to track down later.
- Reconciliation at the end of the workday: Compare the planned number of items with the number of shipping slips, and any remaining items will be carried over to the next day.
FAQ
Q: Is there a separate data set called "shipping plan"?
We do not have this data as a separate entity. This screen is a display-only view that groups orders by delivery date and shipping destination. Saving actually translates into updating the order, picking list, and inventory allocation data.
Q: What do the picking status badges mean?
- Not Created: The picking list has not yet been created.
- Draft: Picking list created (picking has not yet started)
- In progress: Picking in progress
- Completed: Picking complete, awaiting creation of shipping slip.
Q: If I change the shipping date, will the customer be automatically notified?
This screen does not have an automatic notification function. If necessary, the receiving party will need to set up a separate notification customization.
Q: What is the role of a picker?
This is the person who actually performs the picking work in the warehouse. Once assigned as the person in charge, the corresponding picking list will be displayed on their scan screen.
Q: There is a staff member who cannot open the screen.
You may lack the necessary permissions (roles) to access the screen. Please ask your administrator to grant you screen access rights using the Sales/Warehouse Staff role.
Next Steps
- Record shipping performance → Shipping slip
- Overall overview of order progress → Order progress board
- Invoice after shipment → Sales invoice
- Overview of sales operations → Sales workflow