Shipping slip
This document explains the procedure for creating shipping slips and recording shipping results. It is a starting point for finalizing actual shipments, linked to the shipping planning screen and the field scan screen.
Related Articles Shipping plan is Shipping Schedule Please refer to the following. Information on entering actual data from on-site scans (ship_scan_pc / direct_ship_pc, etc.) will be covered in an article in Phase 3. The overall sales process is Sales workflow , an overview of the progress is Order progress board Please refer to the following.

What you can do on this screen
A shipping slip is a document that records the fact that goods have been shipped (delivered) to the customer. Once the slip is submitted (confirmed), the inventory will be automatically reduced from the designated warehouse.
- You can formally record the handover of the goods.
- Inventory is automatically reduced, eliminating the need for manual inventory adjustments.
- It will be automatically linked to orders and invoices.

Overall view of the screen
A shipping slip is broadly composed of header information (who the item was shipped to and when) and item table (what was shipped, where it was shipped from, and how many items were shipped).
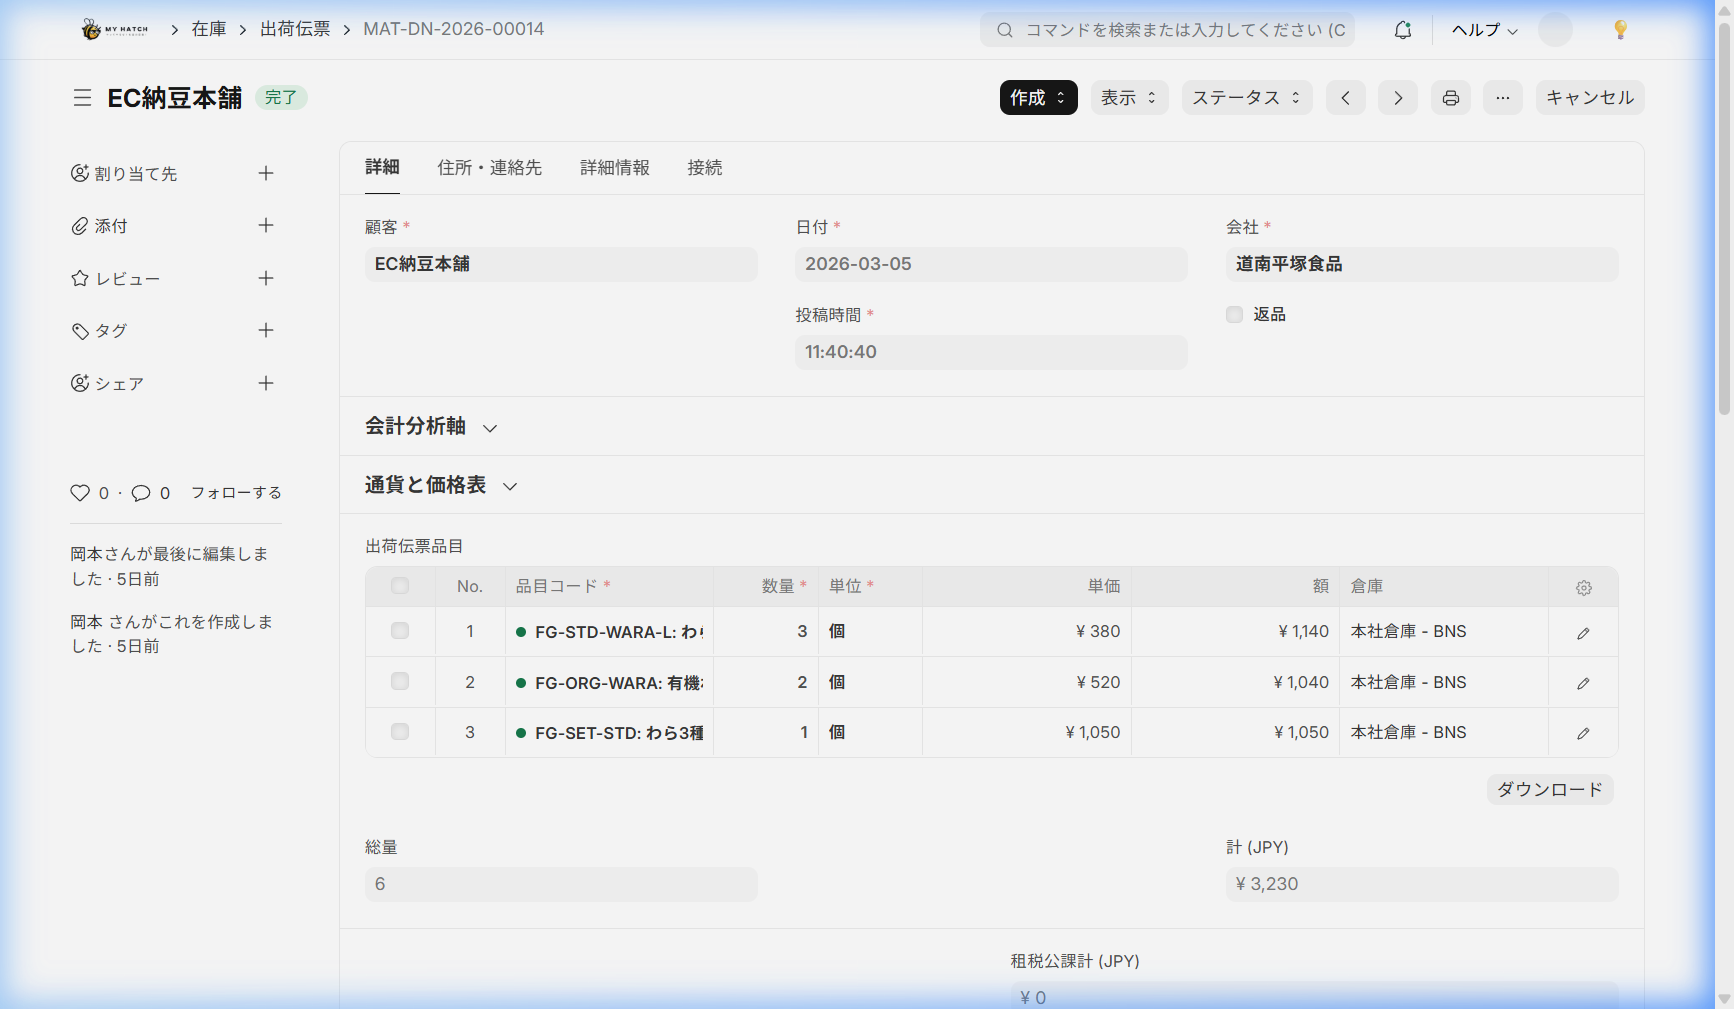
Header Information
| Item | Description | Required |
|---|---|---|
| Customer (Supplier) | Delivery destination supplier | Required |
| Transfer Date | Shipping Date (Date when inventory decreases) | Required |
| Shipping Address | Delivery address (automatically retrieved from customer master data) | — |
Item Table
| Item | Description |
|---|---|
| Item Code | Items to be shipped |
| Quantity | Shipment Quantity |
| Warehouse | Shipping warehouse (specify the warehouse with the item in stock) |
| Lot Number | Specify if the item is lot-controlled |
| Serial Number | Specify this if the item is managed by serial number |
How to create a shipping slip
Recommended: Created from order
- Confirmed Order received Open
- Click "Create ▾" → "Shipping Slip"
- The items and quantities of the order will be automatically transferred.
When creating a new one
- In the search bar
出荷伝票type - Click "+ Add" and enter the item and quantity.
Operating Procedure (From Saving to Confirmation)
Step 1: Save
Check the items and quantities and click "Save". At this point, it is in draft form.
Step 2: Check Inventory
If there are insufficient stock of certain items when saving, a warning will be displayed. Please change warehouses or wait for restocking to resolve the issue.
Step 3: Submission (Confirmation)
Clicking "Submit" will automatically trigger the following process.
- Inventory Reduction: The quantity shipped will be deducted from the specified warehouse.
- Recording in inventory history: A record of the shipment will be kept.
- Order progress update: Automatically switches to either "Partial shipment" or "Full shipment completed".
Split shipment (when delivery is made in multiple installments)
If you need to ship a single order in multiple installments, do the following:
- Open the order
- "Create ▾" → "Shipping Slip"
- Enter only the quantity to be shipped this time.
- Submission
The order item table displays the "Quantity Delivered," so you can check the remaining quantity at any time.
Status of shipping slip
| Status | Meaning |
|---|---|
| Draft | In progress (not yet reflected in inventory) |
| Submitted | Shipment confirmed, inventory updated |
| Completed | All related invoices are complete |
| Return | Return processed |
| Cancellation | Canceled slip |
Return Processing
If a customer returns an item, follow these steps to return it to inventory.
- Open the relevant shipping slip.
- Click "Create ▾" → "Return"
- Enter the quantity to be returned (this will be displayed as a negative quantity).
- Clicking "Submit" will restore your inventory.
Tips for Use
- It's best to create it from the order: Starting with the order prevents transcription errors compared to manual entry.
- Don't forget to specify the warehouse: If you don't specify the correct warehouse, the inventory count will not match.
- Check remaining quantities in split shipments: Make it a habit to check progress using the "quantity delivered" on the receiving end.
Next Steps
This concludes the manual for the sales section. Next, let's move on to the manual for the other staff members.
- To the purchasing manager → Supplier registration and management
- Manufacturing staff → Creating a Bill of Materials (BOM)